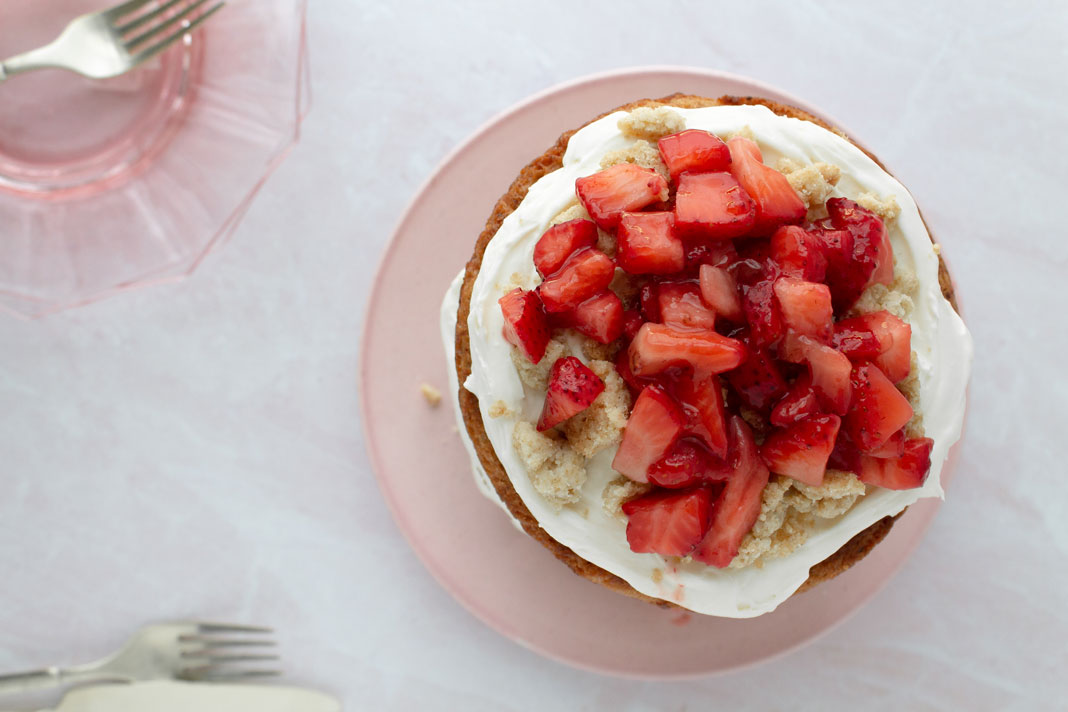
Summer is coming to an end and fall is quickly approaching, which is the best news. I love me some summer nights but Fall as a whole is just better! Fall just has so many good bakes, so many warm flavors, but I’m getting ahead of myself. I thought I’d provide you all with this lovely summer recipe to close out the season!
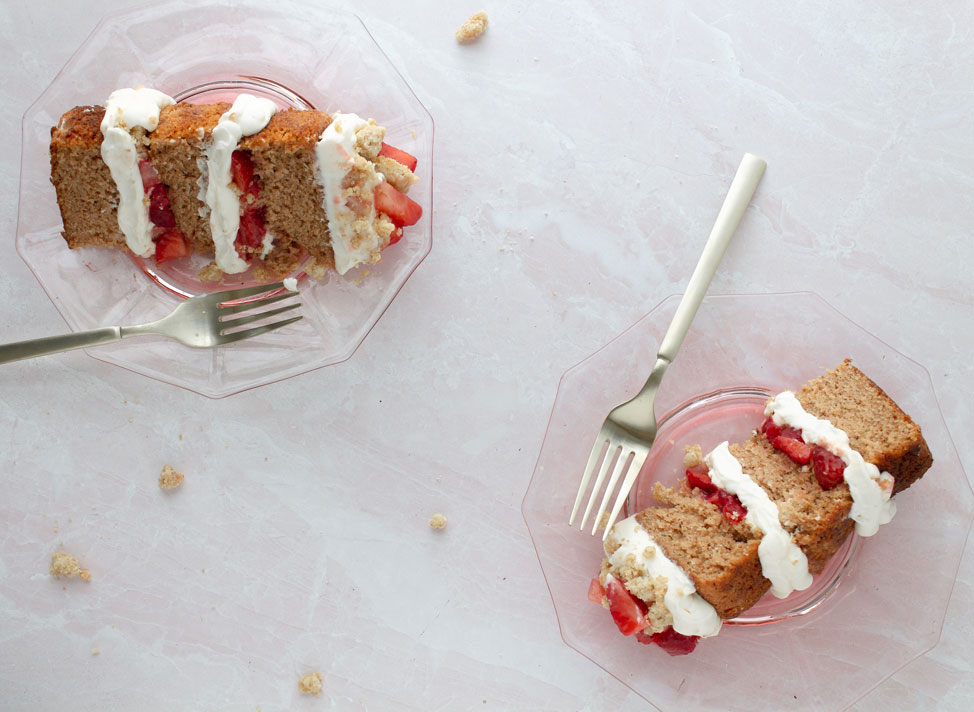
This Strawberry Shortcake is everything it needs to be: light, fluffy and refreshing! The airy strawberry cake layers combine perfectly with the cream cheese whipped cream, fresh strawberries and shortbread cookie crumble to create a party in your mouth. I’m so serious, this isn’t even an exaggeration, I’m really proud of this one and I hope you enjoy it as much as I do!
The Key Ingredients
To find a comprehensive list of ingredients needed to bake this cake, see the full recipe below. Some of the stars of the show however, are…
Freeze Dried Strawberries-When I thought about the classic strawberry shortcake, I realized I wanted more from it. Enter freeze dried strawberries. This recipe does not feature a vanilla cake but rather a strawberry layer cake. The freeze dried strawberries will be pulverized into a strawberry powder to give the cake the most beautiful strawberry flavor.
Freeze dried strawberries are not the easiest to find in the store but I know they can be found at Walmart and Trader Joe’s so if either of those stores are near you, you’re in luck! If not, I recommend this brand from Amazon.
To crush them you can either put all of the strawberries in a plastic bag and crush them with a rolling pin or pan. Another faster option if you have a food processor is to put them in there and crush them until they become a powder. Either way you’ll want to get it as pulverized as you can.
The recipe calls for 1/2 cup of freeze dried strawberry powder. This should be exactly 1 1.2oz bag worth.
Buttermilk-in my opinion nothing beats the tangy, sharp flavor that buttermilk gives to a cake. When you use it you’ll want to make sure it’s at room temperature! The buttermilk can easily be substituted with sour cream, whole milk or your favorite unsweetened plant based milk mixed with fresh lemon juice.
Fresh Strawberries-of course the main star of the show are the strawberries themselves. Though these are more of a summer berry, you can still find them in the stores well into the fall!
The Fillings
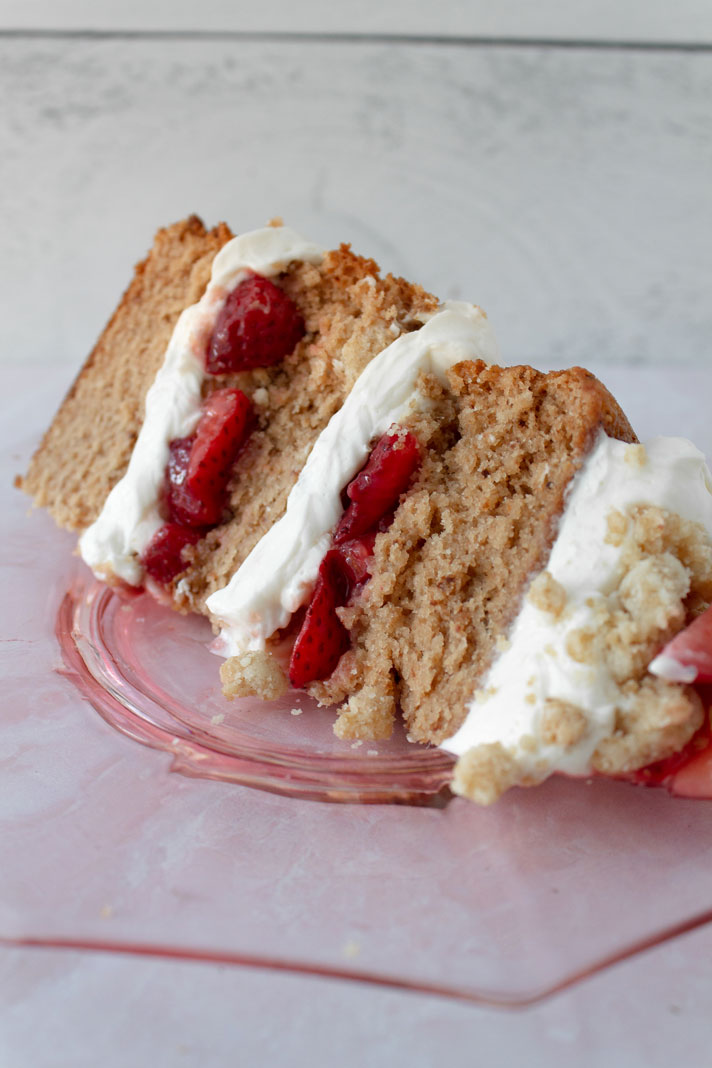
The fillings for this cake are what tie it all together. Without these fillings you’re basically eating strawberries in two different ways! But with the cream cheese whipped cream and the shortbread cookie crumble fillings, this cake balances out both flavor and texture-wise!
Cream Cheese Whipped Cream-the technical term for this is “stabilized whipped cream” but I think cream cheese whipped cream just sounds yummier! The reason we add the cream cheese is because whipped cream on it’s own isn’t sturdy enough to hold the weight of the cake layers. The cream cheese stabilizes the whip and coincidentally tastes amazing!
Shortbread Cookie Crumble-this golden, buttery cookie crumble melts in your mouth and adds that perfect shortbread crunch to the cake. Be sure not to skip this step, you won’t regret it. Confession–I ate soooo many crumbles in the making of this cake. So. Many. Crumbles.
Fresh Strawberries coated in Jam-though I already touched on the fresh strawberries I had to include them in this section as well since they will be layered in between the cakes. Chop them up however you choose and then coat them in strawberry jam to give them a glossy shine and extra flavor!
Time-Saving Tips
This recipe is one of my more time consuming ones because it has a few extra fillings. But no worry, that’s what planning ahead is for. Here are my top tips for saving time come cake assembly day. After all this is supposed to relax you not stress you.
Make the cookie crumble up to three days in advance and store them in an airtight container or bag at room temperature. When it’s time to bake/assemble the cake, instead of having a whole extra thing to mix and bake, you’ll have your shortbread ready to be sprinkled (generously amiright) between those layers!
Chop the strawberries the night before. This takes all of five minutes to chop them and place them in a refrigerator dish to store for the next day. I do not recommend doing this step too early because the strawberries will get too liquidy. I also don’t recommend mixing them with the jam until assembly day for the same reason.
Bake the layers as far in advance as you prefer before you need the cake. Once out of the oven and cooled completely, wrap them in plastic wrap twice, or wrap them once and place them in plastic bags to store in the freezer (if made 5 or more days in advance) or the refrigerator (if made 2 days in advance). This is a good general rule. Bake your cakes on a different day than you decorate them to minimize stress!
For this recipe I typically bake the cake and the cookie crumble and chop the strawberries in the same night, clean as I go along (more on this in the tools section), and store everything according to the above instructions. The cream cheese whipped cream can be made the night before, but it will need to be re-whipped before assembly and I find it best to just make it the day of.
Okay okay enough talk…let’s get to baking! As always please let me know your thoughts on the recipe if you make it and tag me on instagram @karisscorner so I can see your work! Happy Baking!
Can baking be therapeutic?
I often talk about baking being a therapeutic hobby but I’d like to share more about why I feel that way as well as how it can become a relaxing hobby for you!
When I bake, it’s my creative time. I may put on my favorite nostalgic movie or tv show in the background, or a Spotify playlist titled “French café” and leave my troubles behind.
Sometimes I pour myself a glass of wine and light a candle. Then, with the mood set, the mixing of batter, kneading of dough and smoothing of icing is my only care in the world.
When I say baking is therapeutic, sometimes people respond saying “not for me it isn’t!” I completely understand why someone might feel that way. There have been plenty of times where I spend hours on something only for it to fail or something breaks that shouldn’t or I forget to clean as I go and am left with a disastrous kitchen to clean.
So I should in reality, have a caveat to my “baking as therapy” claims…
Baking is therapy when you curate the experience to be relaxing.
How do you curate that relaxing experience for yourself, you ask?
How to make baking therapeutic…
- Prepare your mind–know that it’s okay if the cake doesn’t rise, or the butter wasn’t chilled enough. Shift your mindset from seeing your failures as mistakes to seeing them as opportunities for learning.
- Prepare your space–I cannot and will not bake on top of a messy kitchen. If I were to do this I would be starting from a place of stress! Take an extra 10 minutes to clean any dishes in the sink and wipe down the counters, this small effort will pay you back greatly in brain space and clarity.
- Clean as you go! I’ll tell you the one way to make baking stressful and tiresome, is to not clean as you go! After I use each ingredient that I no longer need, I put it away.
After each major step in the process, I wipe down the counters and put dishes that are no longer needed in the sink. If there is chill time or baking time I don’t sit, I do the cleaning then. Make this shift and you’ll really notice the difference!
By the way, this last tip really helped me when I was on The Great American Baking Show–and the crew that cleaned up behind us made a point to tell me that my workspace was always so clean they didn’t have much to do!
I would reply by saying “it’s how I stay sane in this tent!”
Additional suggestions:
*Maybe try printing off the recipe instead of looking at it on your phone, tablet or laptop and use this time to unplug from technology for a few hours
**Invite friends or family over to share your creation with you. Time spent with loved ones over food is a universally special experience
And that’s how I discovered baking for my mental health. If you try any of these suggestions, let me know how it went for you! I’m really invested in spreading this message to others in hopes that baking will enhance your lives more than it already does!
 |
Strawberry ShortcakeYield: 10-12 slices Prep Time: 1 hr Baking Time: 45 minutes Total Time: 1 hr 45 minutes |
Ingredients:
For the cake:
- 2 c all-purpose flour
- 1/2 c freeze dried strawberry powder (1 1.2oz bag)
- 2 tsp Baking powder
- 1/2 tsp Salt
- 2 c granulated sugar
- 1/2 c Vegetable oil
- 2 eggs (room temperature)
- 2 egg whites (room temperature)
- 2 tsp Vanilla
- 1 c buttermilk (room temperature)
For the filling:
- 2 c Fresh strawberries
- 2 tbsp Strawberry jam
For the crumble:
- 1c all-purpose flour
- 1/3 c granulated sugar
- 1/3 c brown sugar
- 1/4 tsp salt
- 1/4 c unsalted butter (melted)
For the Cream Cheese Whipped Cream:
- 12oz Cream cheese (room temperature)
- 1 c Powdered sugar
- 1 1/2 c Heavy whipping cream
- 1 tsp vanilla extract
Instructions:
For the cake
- Preheat the oven to 350°F (180 Celsius) and prepare 3 6″ cake pans with nonstick spray and parchment paper.*
- Pulverize 1 1.2oz bag of freeze dried strawberries in a food processor or by hand in a plastic bag with a rolling pin. Once pulverized into a powder, place strawberry powder into a medium bowl. It should measure out to 1/2 cup.
- Measure 2 c of all-purpose flour, 2 tsp of baking powder and 1/2 tsp of salt and place them in the bowl with the strawberry powder. Mix together with whisk or fork and set aside.
- Break 2 whole eggs and 2 egg whites (at room temperature) into either a large bowl or the bowl of a stand mixer fitted with the whip attachment. Add 2 c of granulated sugar to the bowl and whip on medium/high speed for 3-4 minutes. The mixture should be silky and fluffy after the 3-4 minutes.
- Lower the mixer speed and slowly add 1/2c of vegetable oil in a slow stream. Add 2 tsp of vanilla. Whip until fully incorporated into the egg and sugar mixture.
- If using a stand mixer, switch to the paddle attachment and begin to alternate the dry mixture with 1 c of room temperature buttermilk beginning and ending with the dry mixture. Be sure not to overmix batter!
- Once fully mixed and there are no streaks of flour remaining, pour the batter into the 3 prepared cake tins and bake for 25-30 minutes or until a toothpick inserted in the middle of each layer comes out clean.
For the fillings
The crumble
- Mix 1c all-purpose flour, 1/3 c granulated sugar, 1/3 c brown sugar, and ¼ tsp salt in a medium bowl.
- Melt 1/4 c (1/2 stick) unsalted butter in a heatproof bowl and pour it into the dry mixture.
- Give the mixture a good stir until all ingredients are combined. The mixture should be crumbly.
- Place the mixture onto a baking sheet lined with parchment paper and bake at 350 degrees (it’s fine if cakes are still in the oven) for 16-18 minutes or until a golden brown.
- Once out of the oven and cooled, break apart the cookie crumble into small pieces and place in an airtight container or plastic bag.
The Strawberries
- Chop clean strawberries to your preferred size until you have 2 cups and place in a medium bowl.
- Mix in 2 Tbsp of strawberry jam until the jam is evenly distributed. Cover bowl and set aside.
The Cream Cheese Whipped Cream
- Place 12oz Cream cheese (at room temperature), 1 c Powdered sugar, and 1 tsp vanilla extract in a medium bowl or the bowl of your stand mixer fitted with the whip attachment. Mix together until well combined (about 1 minute)
- Slowly pour in 1 1/2 c Heavy whipping cream and whip on medium/high speed until stiff peaks have formed
- Cover and set aside
The Assembly
- Assemble this cake only when the cake layers have completely cooled.
- Place one layer of cake on a plate or board and add whipped cream, cookie crumbles and strawberries, then stack the next cake layer on top and repeat the process until done.
- Enjoy! Best if served the day of or within 2 days.

Leave a Reply