This kitchen sink cookie recipe has a warming and nutty brown butter base and is packed full of pretzels, potato chips and toffee bits for the perfect salty sweet bite! The kitchen sink cookie is the perfect cookie recipe for the adventurous baker!
What is a Kitchen Sink Cookie?
The kitchen sink cookie is a derivative of the phrase “everything but the kitchen sink” where you throw just about everything but the kitchen sink into your cookie batter. The concept took off, made its way into bakeries across America and is beloved by the many dessert lovers who dare to try it. The Panera Kitchen Sink Cookie is probably the most popular one out there. My recipe differs a bit from Panera’s as I use toffee bits instead of caramel and I omit the chocolate. Some call this a sin, if you wish to include chocolate when you make these, I guess I’ll allow it.
If you prefer sans-chocolate cookies like I do, check out my Choclateless Chip Cookies. They’ve caused quite the controversy on the internet!

The Key Ingredients:
The full list of ingredients for this kitchen sink cookie recipe can be found below but here are the key ingredients that really make this cookie so delicious!
Brown Butter-the brown butter gives these cookies a deeper flavor that regular unsalted butter just cannot accomplish! Make sure to use a good quality butter like Kerrygold Irish Unsalted Butter for the best results!
Brown Sugar-brown sugar combined with brown butter is the combination I think I’m going to start calling cookie gold! Trust me, as soon as you pour the brown butter into your sugar mix and smell that alluring aroma, you’ll know exactly what I’m talking about.
Granulated Sugar-this sugar helps to balance out the deep flavors and the sweet and salty ratios!
Falky Salt-we get enough saltiness from the pretzels and chips, but a small pinch of flaky salt on top of these cookies makes them pop just a bit more. This step is optional, but nice to have.
Cinnamon-you can barely taste the cinnamon in the final result. All you’ll know is that a marriage of wam brown butter and cinnamon are playing in the background, balancing the cookie quite nicely.
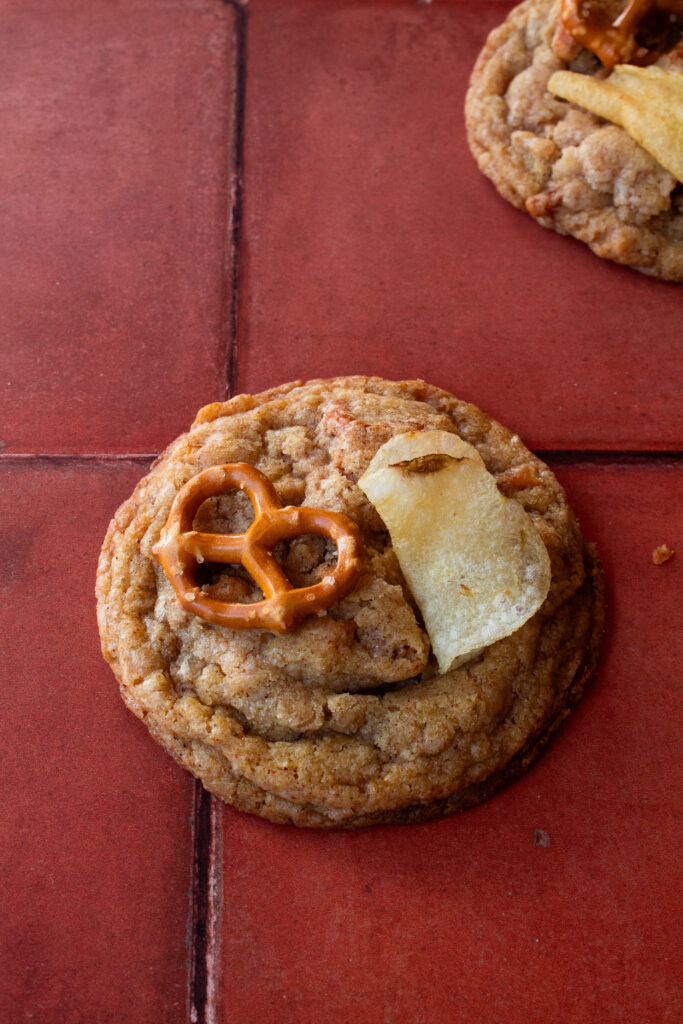
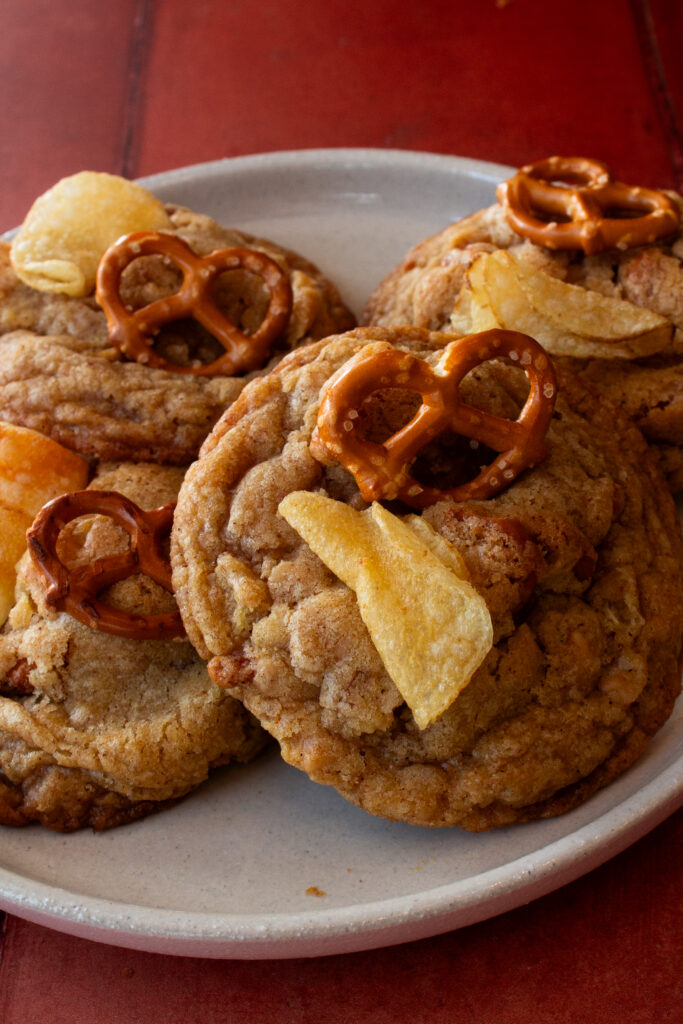
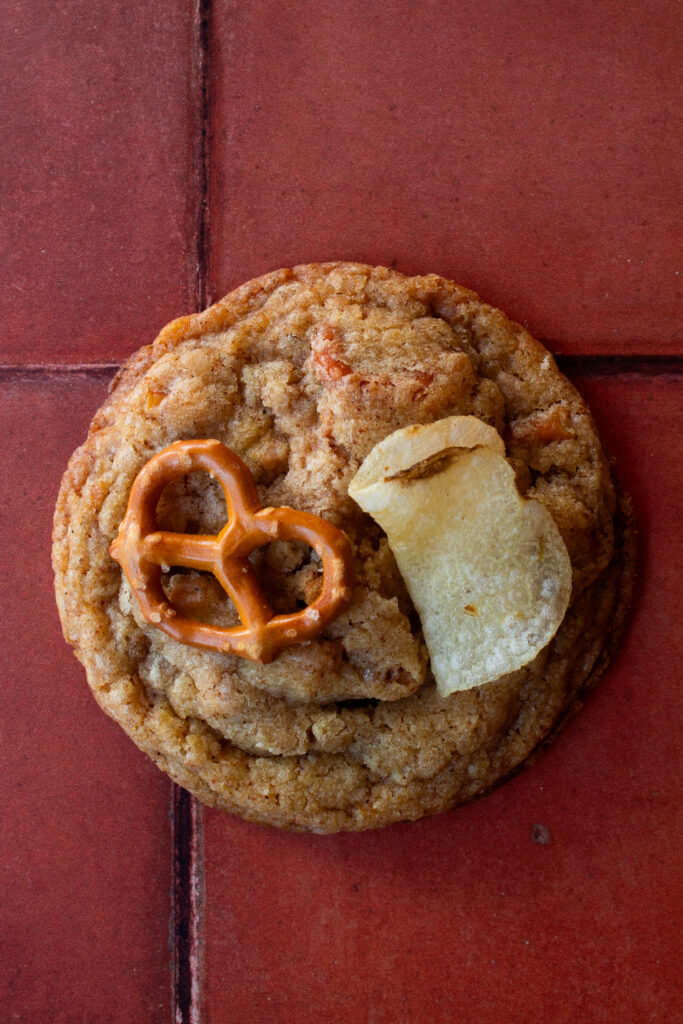
Potato Chips-any original sea salt chip will do. Some of my favorites are Lay’s Wavy and Cape Cod Kettle Chips.
Toffee Bits-I use the Heath Bits O’ Brickle English Toffee Baking Bits but they can also be found at Walmart or in most grocery stores in the baking section, not the candy aisle.
Pretzels-any brand of original salted pretzel will do. I use Snyder’s of Hanover Mini Gluten Free Pretzels because they taste extra buttery to me!
How To Brown the Butter:
Cut butter into pieces-before adding butter to medium heat, cut it and let it sit out of the refrigerator for about 10 minutes. Cutting the butter will help make sure the heat distributes evenly and letting it sit out will help it not to heat too fast.
Keep it constantly moving-Keep the butter moving with a spatula or whisk the entire time it is over the heat. Don’t try to multitask during this, you want to be there with eyes on it the whole time.
Use a lighter saucepan-If you have a light-bottomed pan use it to heat the butter so that you are able to better see when it has browned. Be careful here, it can go from perfectly browned to burnt very quickly!
Include all the brown bits!-Don’t leave the brown bits in the pan, this is what brings that bold flavor!
quick tip on the brown butter for this recipe
If you have time to prepare the brown butter the day before you intend to bake these kitchen sink cookies it would save you about 30 minutes. After browning the butter for this recipe, it needs to be brought back to room temperature to cream with the sugars.
If you do it all the day of you can achieve this by pouring the browned butter into a heat safe container (I use my 24oz square glass storage container). Allow it to sit at room temperature for 10 minutes and then the freezer for about 20-25 minutes. The chill times will differ depending on the size of the container you pour the butter into with the more surface area giving you a faster cooling time. You want room temperature butter in the end, not cold butter.
How to Make Kitchen Sink Cookies
- After you have browned the butter (instructions above) and allowed it to return to room temperature, measure out the brown sugar and granulated sugar and place them in a large bowl with the room temperature brown butter.
- Use a stand or hand mixer to beat the butter and sugars for about 1-2 minutes until slightly fluffy and lighter in color.
- Beat in the eggs until just combined. Then add the vanilla extract. Do not overmix.
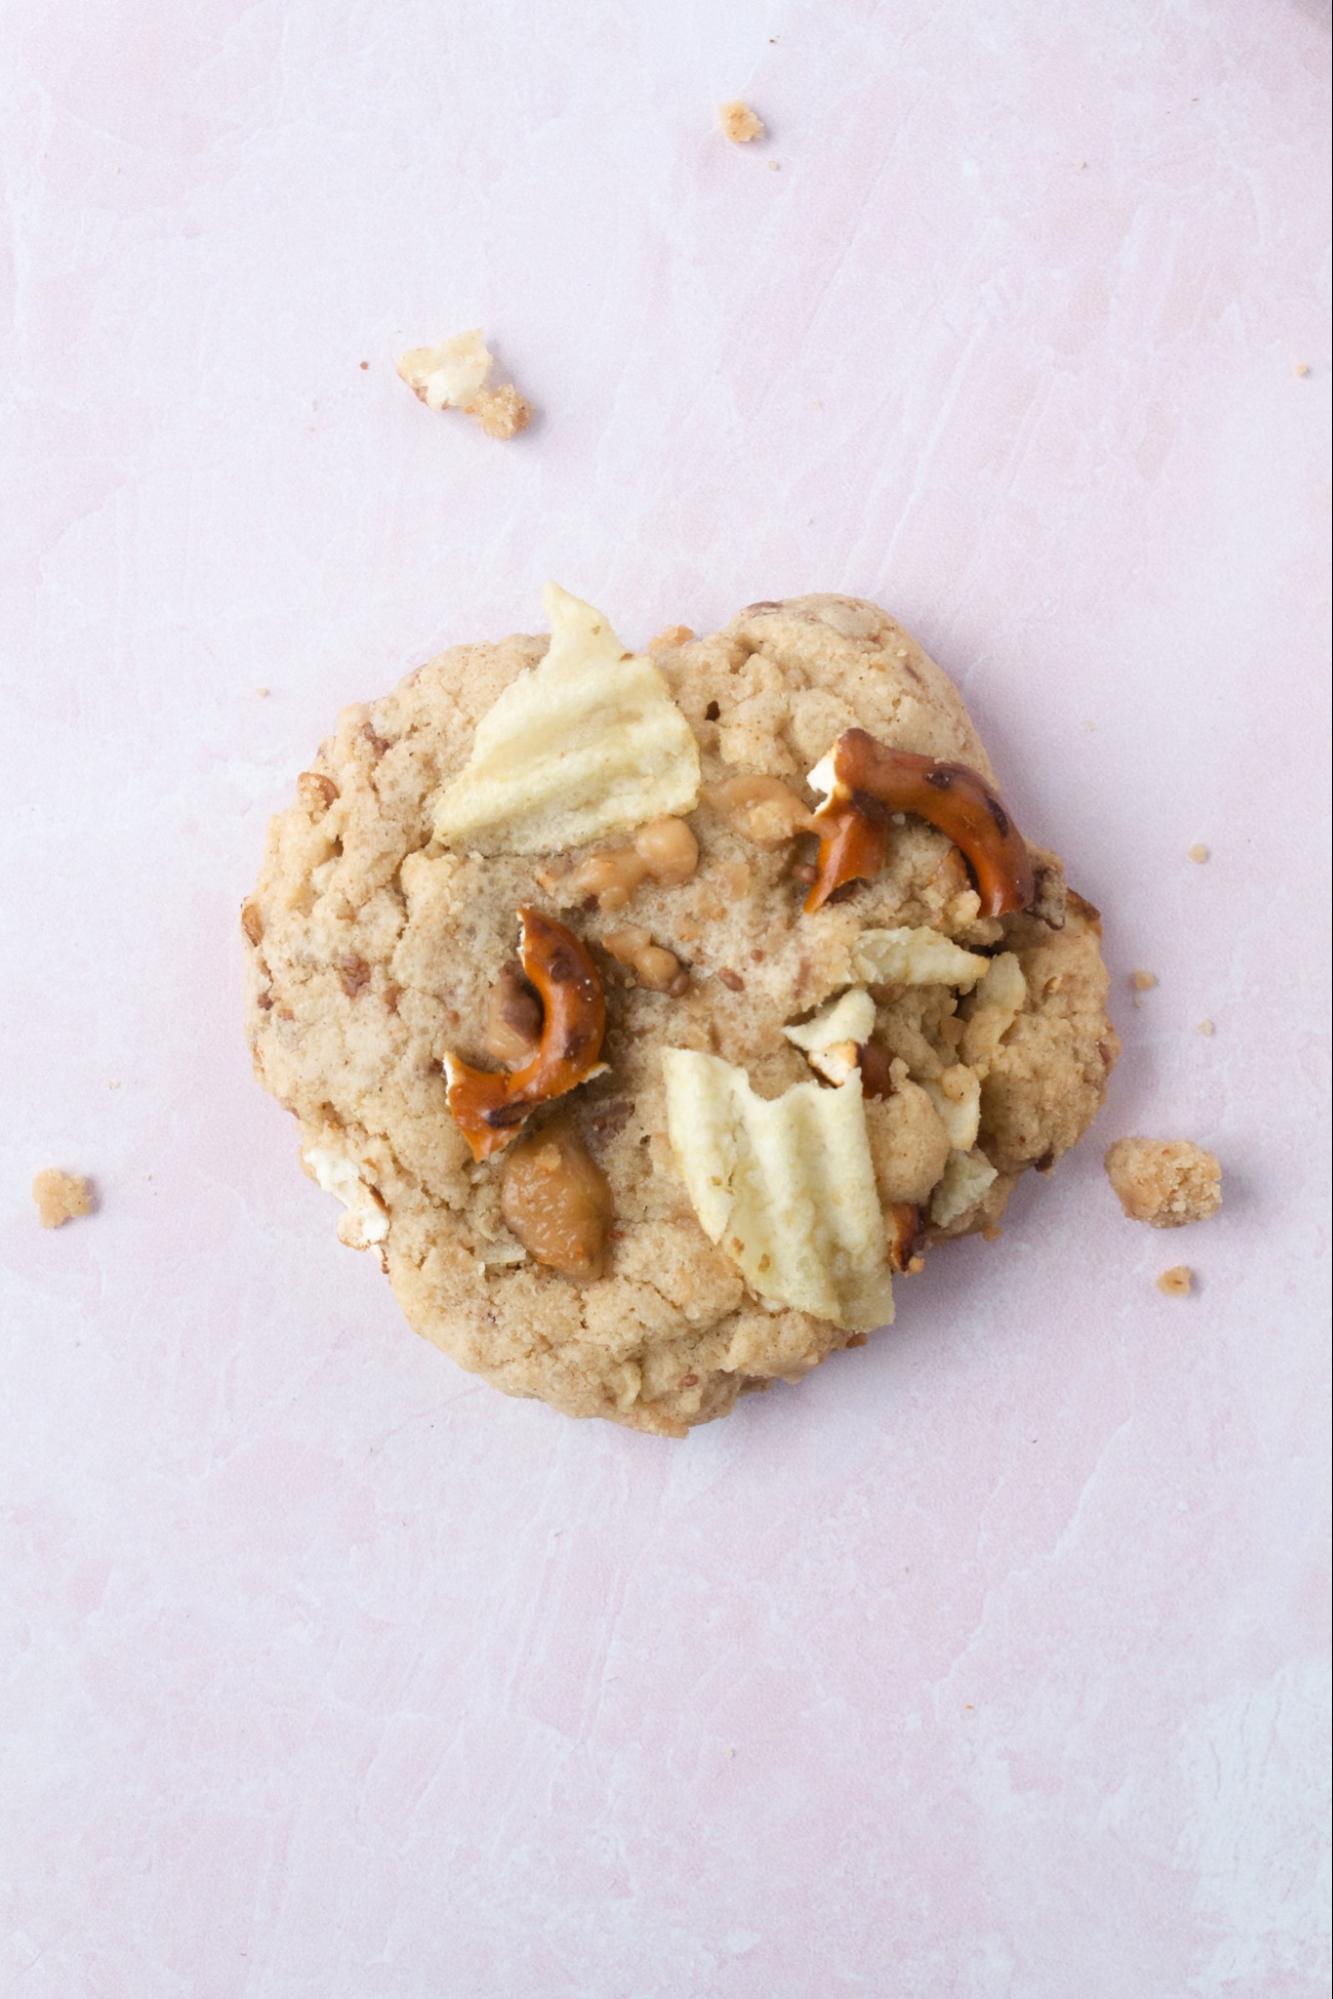
- In a separate bowl, whisk together the all purpose flour, baking powder, baking soda and cinnamon. In a separate bowl, measure and mix the chopped mix-ins (pretzels, potato chips, toffee bits, caramel, chocolate chips, your choice, your kitchen sink cookies!)
- First add the flour mixture and stir until almost combined. Once most of the flour streaks are gone, add the mix ins until they are evenly distributed throughout the batter.
- Scoop the cookies with a 3 Tbsp cookie scoop. I don’t have a 3Tbsp so I used my 1.5Tbsp cookie scoop and gave each cookie two scoops. You can also use a regular spoon to scoop the dough. You should have 13 cookies total.
- The cookie dough will be quite soft at this point. I like to Scoop, refrigerate for 15 minutes, then roll them into neat balls with my hands once they’ve firmed up a bit. They need to chill for a total of 1 hour. Return them to the fridge to continue chilling before baking.
- Preheat the oven to 350F and line two baking sheets with parchment paper.
- Optional before baking: add a few more pretzels, chips and toffee bits on top! We eat with our eyes first.
- Bake for 13 minutes or to your preference. I bake mine until they are soft in the middle and slightly golden on the outer edge. Depending on the size of your cookies, you might need to adjust the time. Just keep in mind that when baking cookies you always want to take them out of the oven before they are fully done. They will finish firming up on the pan when they cool.
- Remove from oven and allow cookies to cool on sheet pan for 5 minutes. Then move them to a wire rack to cool fully.
- Serve them warm and enjoy! They can be stored in an airtight container for up to 5 days!

Can I Customize my Kitchen Sink Cookie?
Absolutely! The beauty of the kitchen sink cookie is that it’s completely customizable. I tend to like toffee more than caramel and prefer to eliminate the chocolate but feel free to replace one of the ingredients with chocolate chips or just add them in. If you want to add:
Chocolate Chips…try semi-sweet chocolate and use around 1/2 cup (80g)
Caramel Candy…replace the toffee bits with the same amount of caramel. Try Brach’s Classic Chewy Caramels!
M&Ms…use the same measurements as the chocolate chips! Peanut M&Ms are actually my favorite, but original would be great too.
Time to bake! Don’t forget to leave me a message letting me know how it goes when you bake them! Tag me on Instagram @karisscorner so that I can see your bakes!!
Can baking be therapeutic?
I often talk about baking being a therapeutic hobby but I’d like to share more about why I feel that way as well as how it can become a relaxing hobby for you!
When I bake, it’s my creative time. I may put on my favorite nostalgic movie or tv show in the background, or a Spotify playlist titled “French café” and leave my troubles behind.
Sometimes I pour myself a glass of wine and light a candle. Then, with the mood set, the mixing of batter, kneading of dough and smoothing of icing is my only care in the world.
When I say baking is therapeutic, sometimes people respond saying “not for me it isn’t!” I completely understand why someone might feel that way. There have been plenty of times where I spend hours on something only for it to fail or something breaks that shouldn’t or I forget to clean as I go and am left with a disastrous kitchen to clean.
So I should in reality, have a caveat to my “baking as therapy” claims…
Baking is therapy when you curate the experience to be relaxing.
How do you curate that relaxing experience for yourself, you ask?
How to make baking therapeutic…
- Prepare your mind–know that it’s okay if the cake doesn’t rise, or the butter wasn’t chilled enough. Shift your mindset from seeing your failures as mistakes to seeing them as opportunities for learning.
- Prepare your space–I cannot and will not bake on top of a messy kitchen. If I were to do this I would be starting from a place of stress! Take an extra 10 minutes to clean any dishes in the sink and wipe down the counters, this small effort will pay you back greatly in brain space and clarity.
- Clean as you go! I’ll tell you the one way to make baking stressful and tiresome, is to not clean as you go! After I use each ingredient that I no longer need, I put it away. After each major step in the process, I wipe down the counters and put dishes that are no longer needed in the sink. If there is chill time or baking time I don’t sit, I do the cleaning then. Make this shift and you’ll really notice the difference!
By the way, this last tip really helped me when I was on The Great American Baking Show–and the crew that cleaned up behind us made a point to tell me that my workspace was always so clean they didn’t have much to do!
I would reply by saying “it’s how I stay sane in this tent!”
Additional suggestions:
*Maybe try printing off the recipe instead of looking at it on your phone, tablet or laptop and use this time to unplug from technology for a few hours
**Invite friends or family over to share your creation with you. Time spent with loved ones over food is a universally special experience
And that’s how I discovered baking for my mental health. If you try any of these suggestions, let me know how it went for you! I’m really invested in spreading this message to others in hopes that baking will enhance your lives more than it already does!
 |
Brown Butter Toffee CookieYield: 13 cookies Prep Time: 15 minutes Baking Time: 13 minutes Total Time: 1 hour and 20 minutes |
Ingredients:
- 1 c (226g) unsalted butter, browned
- 1 tsp vanilla extract
- 1 c (200g) brown sugar, packed
- 2 Tbsp (30g) granulated sugar
- 1 egg + 1 egg yolk
- 1.5 c (190g) all purpose flour
- 1 tsp baking powder
- 1/2 tsp baking soda
- 1 tsp cinnamon
- 1 c (50g before chopped) pretzels, chopped
- 1 c (50g before chopped) lays chips, chopped
- 1/2 c (80g) toffee bits
- pinch of flaky salt to top, optional
Instructions:
- Brown 1 cup (226g) of unsalted butter (cut into Tbsp pieces) in a (preferably) light bottomed pan by turning the burner to medium heat and whisking the butter constantly. Do not walk away while browning the butter. The butter will melt, foam, bubble and then turn an amber color producing brown bits on the bottom. Take it off the heat as soon as brown bits appear so as to not burn it.
- Pour the browned butter into a heat safe container (like this one 24oz square glass storage container). Allow it to sit at room temperature for 10 minutes and then the freezer for about 20-25 minutes. The chill times will differ depending on the size of the container you pour the butter into. You can also prepare the brown butter ahead of time.
- After you have browned the butter and allowed it to return to room temperature, measure out 1 cup (200g) of brown sugar and 2 Tbsp (30g) of granulated sugar and place them in a large bowl with the room temperature brown butter.
- Use a stand or hand mixer to beat the butter and sugars for about 1-2 minutes until slightly fluffy and lighter in color.
- Beat in 1 egg and 1 egg yolk until just combined. Then add 1 tsp of vanilla extract. Do not overmix.
- In a separate bowl, whisk together 1.5 cups (190g) of all purpose flour, 1 tsp of baking powder, 1/2 tsp of baking soda and 1 tsp of cinnamon. In a separate bowl, measure and mix the chopped mix-ins (pretzels, potato chips, toffee bits, caramel, chocolate chips, your choice, your kitchen sink cookies!)
- First add the flour mixture to the butter sugar mixture and stir until almost combined. Once most of the flour streaks are gone, add the mix ins until they are evenly distributed throughout the batter.
- Scoop the cookies with a 3 Tbsp cookie scoop. I don’t have a 3Tbsp so I used my 1.5Tbsp cookie scoop and gave each cookie two scoops. You can also use a regular spoon to scoop the dough. You should have 13 cookies total.
- The cookie dough will be quite soft at this point. Scoop, refrigerate for 15 minutes, then roll them into balls with your hands once they’ve firmed up a bit. They need to chill for a total of 1 hour. Return them to the fridge to continue chilling before baking.
- Preheat the oven to 350F and line two baking sheets with parchment paper.
- Optional before baking: add a few more pretzels, chips and toffee bits on top! We eat with our eyes first.
- Bake for 13 minutes or to your preference. I bake mine until they are soft in the middle and slightly golden on the outer edge. Depending on the size of your cookies, you might need to adjust the time. Just keep in mind that when baking cookies you always want to take them out of the oven before they are fully done. They will finish firming up on the pan when they cool.
- Remove from oven and allow cookies to cool on sheet pan for 5 minutes. Then move them to a wire rack to cool fully.
- Serve them warm and enjoy! They can be stored in an airtight container for up to 5 days!


Leave a Reply