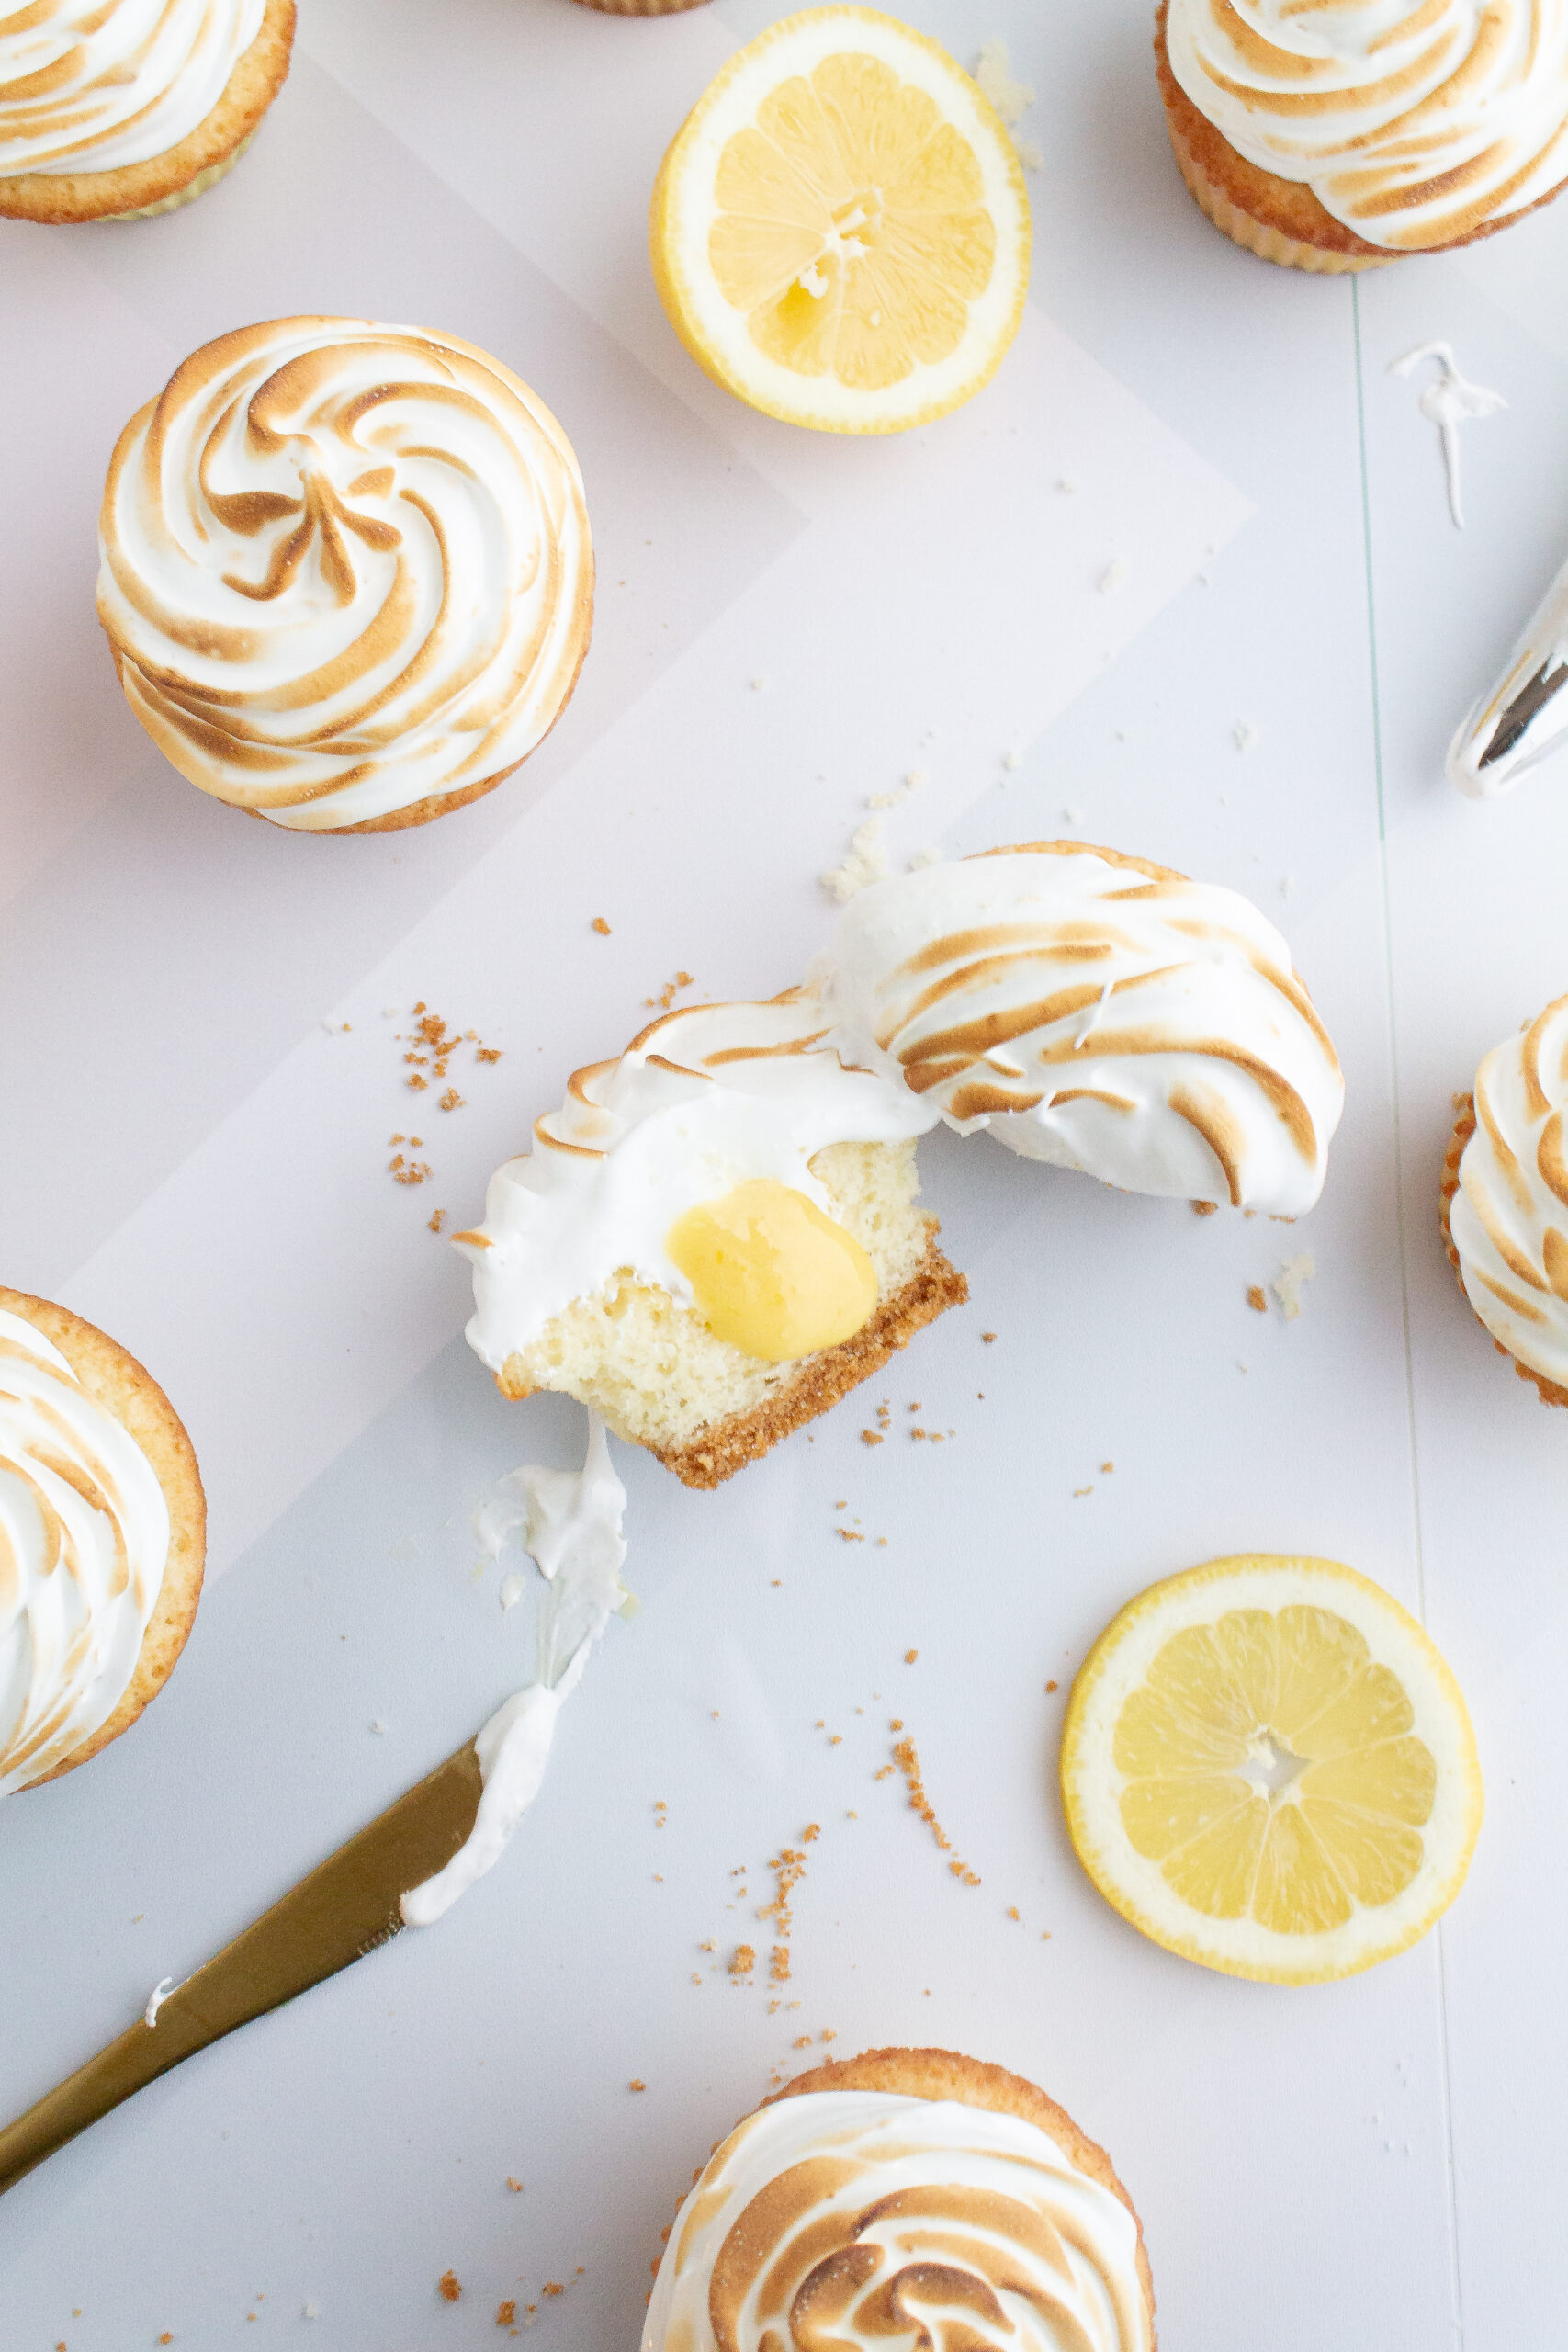
These punchy lemon meringue cupcakes start with a graham cracker crust, a vanilla cupcake filled with lemon curd, and a toasted meringue top! They’re cupcake-meet-lemon meringue pie, and they’re to die for!
Okay so listen, I assume if you didn’t immediately hit the “Jump to Recipe” button and are actually reading the bulk of the blog post then you’re either a) a family member or close friend of mine, or b) really love baking and want to learn from my tidbits of knowledge on how to perfect these lemon meringue cupcakes! If you’re a family member or friend, then hello to you!
If you’re just a baking girlie like myself, then an even BIGGER hello to you! You have found the corner of the internet where I consistently argue that baking is therapeutic and should be a regular hobby in our busy, fast-moving lives! You’ve also found the corner where toasted lemon meringue cupcakes are just a normal, casual thing we whip up. In essence, you’ve found your people.

My lemon meringue cupcakes have four elements, the graham cracker crust, the vanilla cupcake, the lemon curd and the toasted swiss meringue. Below you will find helpful tips to make sure you master each element!
The Graham Cracker Crust
There isn’t much to say here, this lemon meringue cupcake recipe features a standard (and delicious) graham cracker crust. The most important thing is to make sure you have grease-proof cupcake liners.
The Vanilla Cupcakes
This vanilla cupcake recipe makes the fluffiest and most flavorful cupcakes. They can be mixed by hand using a whisk, a hand mixer or a stand mixer. I’ve made them all three ways, all yielding delicious results! The cupcakes can be made the night before, and stored in an airtight container, to save on time.
A Note on Cake Flour
The reason I prefer to use cake flour in a lot of my cakes and cupcakes is that cake flour contains less protein and therefore tends to produce a softer crumb. It’s a little bit of insurance in case you accidentally overmix your batter.

The Lemon Curd
I recommend making the lemon curd first, if not the night before you want these cupcakes, so that it has enough time to chill.
I’ve spent years perfecting my lemon curd recipe and I know you’re going to love it. I prefer to leave the zest in the curd for added texture, but you’re welcome to pass it through a sieve before refrigerating it if you prefer it smooth.
The Swiss Meringue
The swiss meringue is the most technical part of these lemon meringue cupcakes, but using these tips you should have no trouble with it!
You will need a small hand torch to toast the meringue. I used to think they were a kitchen luxury until I finally broke down and bought myself one. To my surprise there are actually lots of affordable handheld torches out there. You can easily spend under $20 on this kitchen tool, and it will pay you back in all of the fun and deliciousness it provides.
You will also need a kitchen thermometer to make this Swiss Meringue.
A Swiss Meringue uses a bain-marie to heat the egg whites and sugar to 160℉ (roughly 71℃). This is the most tedious part, constantly stirring the egg whites and sugar and waiting for it to heat to the correct temperature.
After this step, you simply remove the heated mixture from the heat and whip it until stiff peaks form!
Add the meringue to a piping bag fitted with a large star attachment so that when you torch it, it will reveal tons of texture.

Be sure to tag me on instagram @karisscorner if you make these lemon meringue cupcakes! They’re one of my family’s favorites and I know your loved ones will adore them too!
Can baking be therapeutic?
I often talk about baking being a therapeutic hobby but I’d like to share more about why I feel that way as well as how it can become a relaxing hobby for you!
When I bake, it’s my creative time. I may put on my favorite nostalgic movie or tv show in the background, or a Spotify playlist titled “French café” and leave my troubles behind.
Sometimes I pour myself a glass of wine and light a candle. Then, with the mood set, the mixing of batter, kneading of dough and smoothing of icing is my only care in the world.
When I say baking is therapeutic, sometimes people respond saying “not for me it isn’t!” I completely understand why someone might feel that way. There have been plenty of times where I spend hours on something only for it to fail or something breaks that shouldn’t or I forget to clean as I go and am left with a disastrous kitchen to clean.
So I should in reality, have a caveat to my “baking as therapy” claims…
Baking is therapy when you curate the experience to be relaxing.
How do you curate that relaxing experience for yourself, you ask?
How to make baking therapeutic…
- Prepare your mind–know that it’s okay if the cake doesn’t rise, or the butter wasn’t chilled enough. Shift your mindset from seeing your failures as mistakes to seeing them as opportunities for learning.
- Prepare your space–I cannot and will not bake on top of a messy kitchen. If I were to do this I would be starting from a place of stress! Take an extra 10 minutes to clean any dishes in the sink and wipe down the counters, this small effort will pay you back greatly in brain space and clarity.
- Clean as you go! I’ll tell you the one way to make baking stressful and tiresome, is to not clean as you go! After I use each ingredient that I no longer need, I put it away.
After each major step in the process, I wipe down the counters and put dishes that are no longer needed in the sink. If there is chill time or baking time I don’t sit, I do the cleaning then. Make this shift and you’ll really notice the difference!
By the way, this last tip really helped me when I was on The Great American Baking Show–and the crew that cleaned up behind us made a point to tell me that my workspace was always so clean they didn’t have much to do!
I would reply by saying “it’s how I stay sane in this tent!”
Additional suggestions:
*Maybe try printing off the recipe instead of looking at it on your phone, tablet or laptop and use this time to unplug from technology for a few hours
**Invite friends or family over to share your creation with you. Time spent with loved ones over food is a universally special experience
And that’s how I discovered baking for my mental health. If you try any of these suggestions, let me know how it went for you! I’m really invested in spreading this message to others in hopes that baking will enhance your lives more than it already does!
Happy Baking!

Lemon Meringue Cupcakes
Ingredients
For the Lemon Curd
- 1/2 cup granulated sugar
- 1 Tbsp fresh lemon zest
- 1/4 cup fresh lemon juice 1 lemon should suffice for juice and zest
- 3 large egg yolks
- 1/4 cup unsalted butter cold
For the Graham Cracker Crust
- 3/4 cup finely ground graham cracker
- 1 Tbsp granulated sugar
- 3 Tbsp unsalted butter melted
For the Cupcakes
- 1 1/4 cup granulated sugar
- 3/4 stick unsalted butter room temperature
- 1/4 cup vegetable oil
- 2 large eggs room temperature
- 1 large egg white room temperature
- 1 1/2 cups cake flour
- 1 tsp baking powder
- 1/8 tsp salt
- 1/2 cup buttermilk room temperature
- 1 tsp vanilla extract
For the Swiss Meringue
- 6 large egg whites approx. 230g
- 2 cups granulated sugar
- pinch of salt
- 1 tsp vanilla extract
Instructions
For the Lemon Curd
- Add 1/2 c granulated sugar and 1 Tbsp lemon zest to a small/medium saucepan that is off the heat. Give the mixture a vigorous whisk.
- Add 3 large egg yolks to the saucepan and give the mixture another vigorous whisk until the mix has lightened in color.
- Pour in 1/4 c fresh lemon juice and whisk until combined.
- Place the saucepan over low/medium heat making sure to whisk constantly. Pay special attention to the edges of the saucepan, the curd would most likely burn here if anywhere. Whisk constantly until the mix thickens. You’ll know it’s done when it reaches a hollandaise sauce consistency. It will thicken even more in the refrigerator.
- Pull lemon curd off of the heat and mix in 1/4 c cold butter that has been cut into small pieces. Mix until butter has melted.
- (Optional) Pass the lemon curd through a kitchen sieve to get rid of any lemon zest.
- Place in an airtight container and let cool/thicken in the refrigerator for 1 hour. It will last in the fridge for up to 5 days.
For the Graham Cracker Crust
- Preheat the oven to 350°F (roughly 180°C) and line cupcake pan with grease proof cupcake liners.
- In a food processor, blitz graham crackers until finely ground, ending up with 3/4 cup of finely ground graham crackers. Place ground graham crackers into a medium bowl. May use plastic bag and rolling pin if you do not have a food processor.
- Add 1 Tbsp of granulated sugar and 3 Tbsp of melted unsalted butter to the bowl and give the mixture a good stir.
- Scoop 1 Tbsp of the graham cracker mixture into each cupcake liner and press down gently so that the crust sticks together.
- Bake for 4 minutes. Remove from oven and allow crust to cool.
For the Cupcakes
- Reduce oven temperature to 325°F (162 ℃).
- In a large bowl or in the bowl of a stand mixer, place 3/4 stick of room temperature unsalted butter and 1 1/4 cups of granulated sugar and beat on medium speed until the mixture is light and fluffy (at least 2-3 minutes).
- While the butter and sugar are mixing, in a medium bowl measure out 1 1/2 cups of cake flour, 1 tsp of baking powder and 1/8 tsp of salt. Lightly whisk this mixture together.
- Add in 2 whole eggs, 1 egg white one egg at a time to the butter sugar mixture, mixing after each egg is added and only adding a new egg after the previous one is incorporated into the batter. Add 1/4 cup of vegetable oil and 1 tsp of vanilla extract and mix on low speed until incorporated.
- Scrape down the bowl to make sure everything is mixed thoroughly. At this point, your batter should look pretty light and fluffy.
- Alternate adding the flour mixture and the buttermilk to the batter, starting and ending with the flour. Add 1/3 of the flour mixture, then put my mixer on low speed until it’s incorporated, then 1/2 of the buttermilk, mix on low, 1/3 of the flour, mix, last 1/2 of the buttermilk, mix, final 1/3 of the flour mixture until all is barely incorporated.
- Finally, take a spatula and finish mixing the batter lightly by hand to ensure it is even and smooth.
- Pour even amounts of batter into the cupcake liners directly on top of the cooled graham cracker crust and bake, at 325°F (162 ℃) for 20-25 minutes depending on your oven and environment.
- Remove from the oven and allow cupcakes to cool completely while you get started on your Swiss Meringue.
For the Swiss Meringue
- Create a bain-marie by filling a small/medium saucepan with an inch of water over low heat. The water should be at a simmer.
- Add 6 large egg whites and 2 cups of granulated sugar to a large bowl or the bowl of a stand mixer.
- Place the bowl with the eggs and sugar over the bain-marie and whisk constantly as it heats. Whisk the mixture until it reaches 160°F (roughly 71°C), then remove from the heat.
- Using a hand mixer or the whisk attachment of a stand mixer, whip on medium/high speed. Once the mixture has started to look frothy, add your pinch of salt and 1 tsp of vanilla extract. Then continue to whip until stiff peaks form.
- Add the meringue to a piping bag fitted with the large star tip.
For the Assembly
- You should now have all of your elements ready and cooled.
- Using a cupcake corer or small measuring spoon, carefully remove the centers of each cupcake and fill with cooled lemon curd.
- Generously pipe the Swiss meringue onto each cupcake and, using a kitchen torch, toast the meringue atop each cupcake.
- Serve and ENJOY! Store in an airtight container for up to 2 days.
Leave a Reply